Showing posts with label Baking and Cooking. Show all posts

Tuesday, March 17, 2009

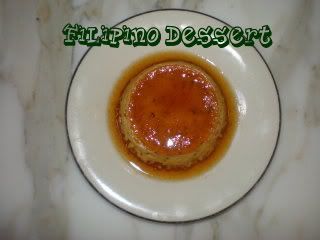
Leche Flan, Caramel Custard, or Flan

The most delicious dessert of them all is leche flan, caramel custard, or flan. Again leche flan is another dessert that I thought was originally Filipino but is not. (I mentioned in my entry on champurado that some Filipino desserts did not originate in Philippines.) Nevertheless, caramel custard is one of the most favored desserts in international cooking. It is easy to make and it is a suitable ending to mechado or any meal.
Upon making leche flan, I realize that addition of egg whites gives air bubbles in the flan, causing holes compared to leche flan made with purely egg yolks. However, I am concern about cholesterol level in my household and I would like to keep my dishes/desserts as healthy as possible without compromising calories, some fat, some sweetness, and taste. So the addition of egg whites makes a healthier version of leche flan. Usually, I make leche flan in an oblong dish or llanera. However, I want to make individual portion for easy serving. Believe me, it was gone in a second! Also, I want to add some flair to the usual egg and milk mixture. So, Irish Creme adds a kick to the original leche flan recipe. Irish Creme already goes well with milk and the taste of alchohol dissipates after baking the flan. What is left is concoction of cinnamon, nutmeg, and blend of Irish Creme without the alcohol. Mi familia loved it!

Use 6 custard molds

Caramel Sauce:
1/2 c brown sugar
1 tb water
Heat until sugar is melted and divide between six custard mold. Wait until sugar hardens before adding egg mixture.

Egg mixture:
1 can evaporated milk
1/3 sugar
2 tsp. vanilla
1/8 tsp. salt.
4 tb Bailey's Irish Creme
4 eggs
1/4 tsp. cinnamon
1/8 tsp nutmeg
Heat milk, sugar, vanilla, salt, Irish Creme. Do not let it curdle. Mix remaining ingredients in a big bowl. Add milk to egg mixture and divide between six custard mold with caramel. Heat oven to 350 degrees F. Place custard molds in a pan with boiling water to similate steam and bake for 40-50 minutes. Remove from water and refrigerate.

Monday, March 16, 2009

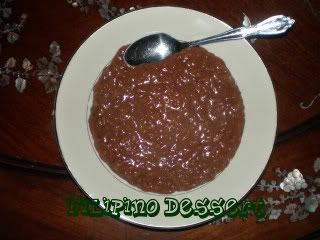
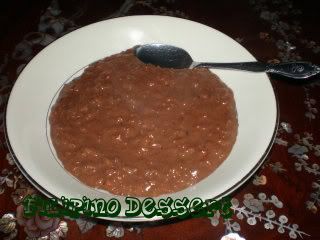
Champurado

I hear many people allude to globalization emerging with the advent of technology. With the invention of Internet and computers, people are connected with each other around the globe and able to share information, objects, emotions, and food. In the United States, when it comes to food, it is as if only recently has many Americans expanded their taste palate. Fifteen years ago when I arrived in California, Mexican food means burrito from Taco Bell, Chinese food equals fried rice, Filipino food is adobo and only a few have tasted Indian food. There were few Filipino markets in Bay Area selling staple food such as rice, fish, sinigang mix in a sachet. In those stores, it was not difficult to find sticky rice or malagkit na bigas. For this reason, champurado has always been in my kitchen in California.
Champurado is a Filipino dessert that unfortunately was not originally developed in Philippines. I learn that we share champurado with Mexican foodies. I was driving one day in the pockets of Los Angeles and I saw a taqueria with a huge banner that says "hot champurado for breakfast served here." I was shook by surprise and I had to actually pull over as I was not wearing my glasses to make sure I read the sign correctly. It turned out that I did not misread. By gullie, I was disappointed to find that champurado is not authentically Filipino. Though I could not trace back to the beginnings of champurado, I know that somewhere along Spanish colonization, Arab, Chinese, India, Malay migration, and Japanese invasion, champurado arrived in Philippines as a dessert/breakfast. This leads me to another question: Who said globalization just started? Globalization started a long time ago. Philippines and champurado are a manifestation of globalization that existed hundred of years ago. Although computers were not existent, many people from different nations have arrived in Philippines to trade goods in a fashion modernly stated as "up rise of globalization." With them, they brought champurado--sticky rice cooked in water with dutch processed cocoa powder, sugar, and milk. A modern version of champurado included in my recipe has 1 tsp of vanilla and cinnamon for dusting. In my short trip in Los Angeles, I learn that champurado is not originally Filipino and I learn to share what I thought was originally mine as a Filipino with other cultures who have brought champurado hundred of years ago in Philippines.

Thursday, March 12, 2009

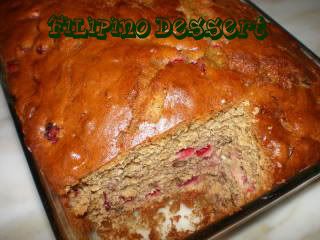
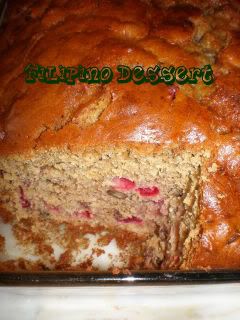
Cranberry Banana Pecan Bread


I'm not a big fan of cranberry. When cranberry is incorporated into bread or cake, I'll eat it. I'll also drink cranberry juice. I find cranberry tangy and sour for a tiny piece of fruit as small as an aratilis. When I found Rose Levy Beranhaum's recipe for Cranberry Banana Walnut Quick Bread, I had to try it for two reasons. I learn from making Rosy's recipe on The Bread Bible that she is a very good baker. I have tried many of her recipes such as Brioche, Challah, Royal Irish Soda Bread and Cranberry Banana Walnut Quick Bread is not far from what I had expected. Although this recipe is not originally her creation, I love it. After letting the bread sit for more than 12 hours, the cranberries have macerated and have mellowed its tanginess. The other reason is I want to use a big bulk of cranberries in my freezer. I want to make something out of a big bag of cranberries. I need to make bread for tomorrow and I decide to incorporate cranberries into my bread. I have two notes here. The only ingredient that I do not have available when making this bread is walnut. I substitute pecan for walnuts. I like pecans in banana bread and brownies and I want to try it with this bread. Perhaps if walnut can be substituted, cranberries can be substituted as well. It might be difficult to find cranberries in Philippines but as I have mentioned earlier these cranberries look like, although do not taste like aratilis. Why not? When your kids are hanging around the park and they bring home 2 cups of aratilis, make Aratilis Banana Pecan Bread. I know if I were in my house in Novaliches I would certainly try it.

Cranberry Banana Pecan Bread
Adapted from Rose Levy Beranhaum's The Bread Bible

2 cups minus 1 tb all purpose flour
1 tsp baking soda
1 tsp salt
4 tb butter, soft
1 c brown sugar
2 brown eggs
1 large very ripe banana
3 tb sour cream
1 tsp vanilla extract
2 c cranberries
1 c pecans toasted

Combine flour, baking soda, and salt. In another bowl, cream the butter, sugar, then add eggs, banana, sour cream, vanilla. Add flour mixture and beat until incorporated. Add cranberries and pecans. Heat oven to 350 degrees F. Bake for 45-55 minutes.

Thursday, March 05, 2009

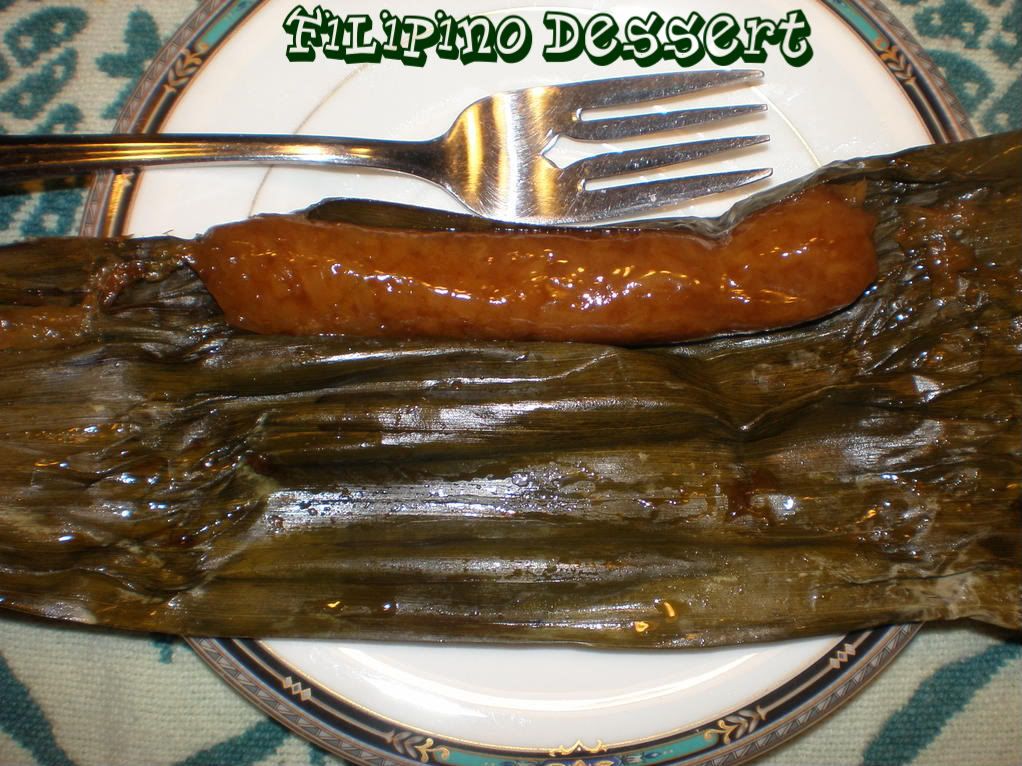
Suman


If there is a name for returning Filipino citizens to Philippines, "balikbayan," should there also be a name for returning Filipino American citizens to America? Should they be called "balikbayan" in America? I may never be able to answer that, but if there is one thing I like about balikbayans in America it is bringing "pasalubong" or gifts.
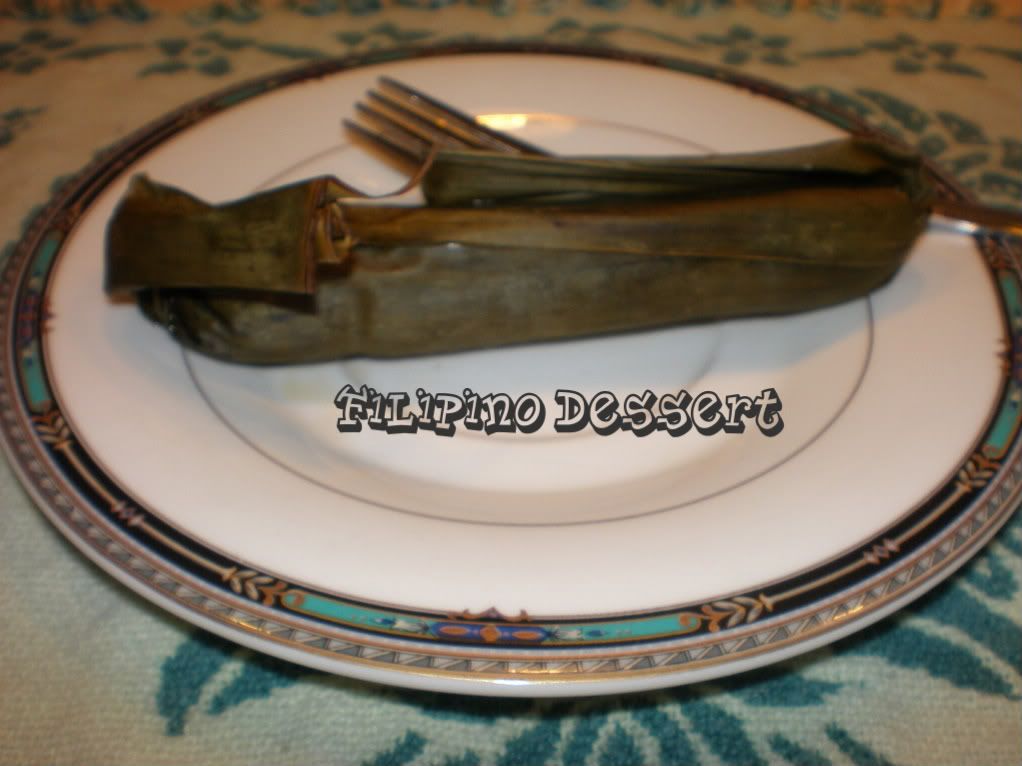
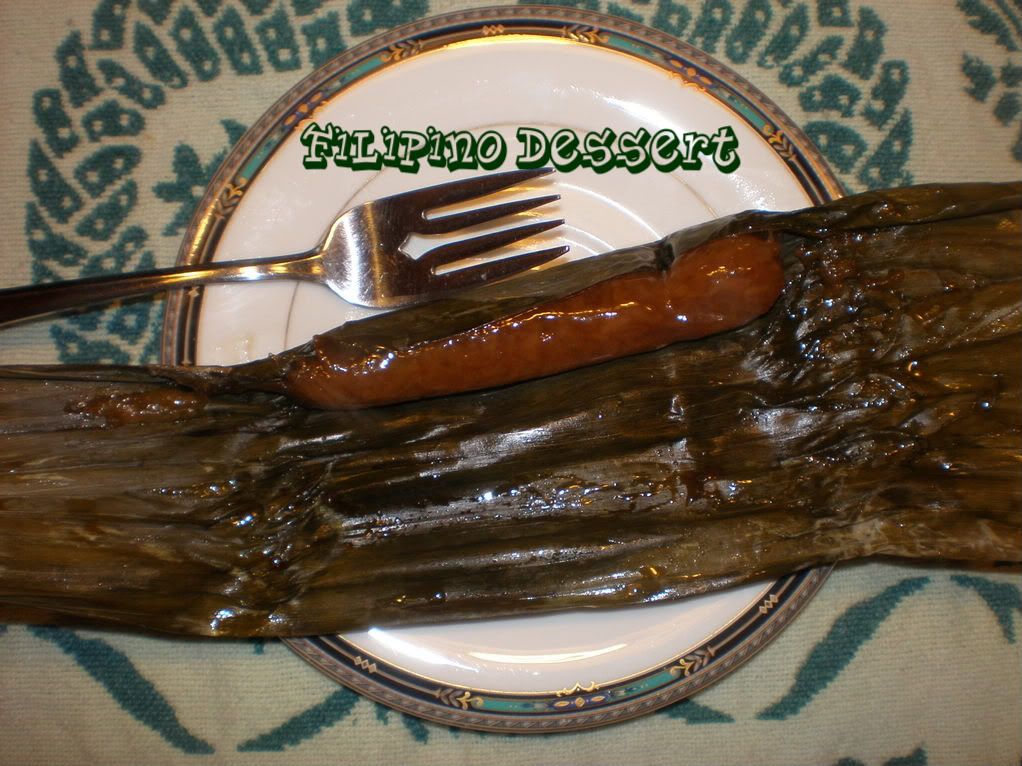
My fave pasalubong is food. Nothing can beat Filipino desserts such as suman or sticky rice dessert. When my granduncle came back, he brought with him suman of different kinds. Although suman varies from region to region, one staple ingredient in suman is sticky rice. Without sticky rice, suman would not be suman. In my granduncle's province, suman is cooked with coconut milk, brown sugar, and coconut oil. This variety is wrapped in banana leaf. When I bite into it, I can taste each ingredient. The rice has mellowed its flavor and has absorbed the brown sugar and coconut milk that it does not taste like rice anymore. A good suman has a rich coconut milk flavor.
When you decide to bring suman with you back to America, buy freshly cooked suman, preferably cooked the day of your departure. Upon returning to America, store in freezer for upto 3 months. To reheat, steam on stove or place in the microwave with a cup of water to stimulate steam.

Monday, March 02, 2009

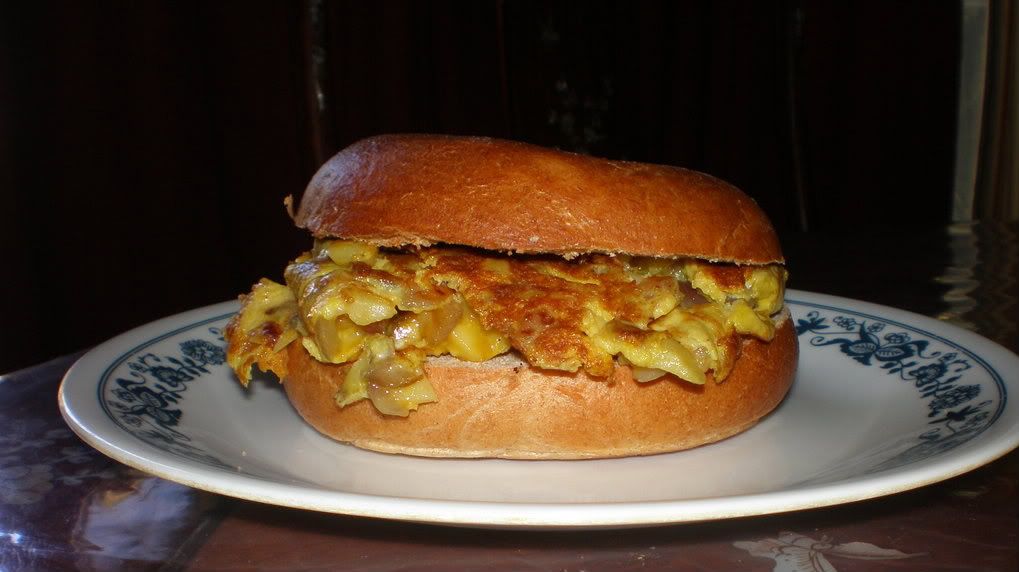
Sweet potato omelet on a Bagel

Sweet potato omelet is a variation of potato omelet or tortillas de patatas. My first instinct was to eat sweet potato omelet as a tapa. I had it all planned. I was going to prepare the ingredients, cook them, and serve on a plate sliced bite sized and I was going to eat sweet potato omelet just as it was with no bagel or anything. However, I could not control my stomach making so much noises and whining to be fulled to its maximum potential, so I took a bagel and toasted it and sandwiched sweet potato omelet in the middle. It was filling!
I have a new favorite food now. With or without bagel, sweet potato omelet is so good. The sweetness of sweet potato complements the tanginess and spice of cooked red onions. After making sweet potato omelet, I have turned my back against tortillas de patatas, which I used to love as a kid. With the development of sweet potato omelet, tortillas de patatas is so bland and boring. I have been eating it for as long as I remember. I want something new and tasteful and I got it.
Sweet potato omelet is so easy to make and diced sweet potatoes cooks faster than I thought--3 minutes at least. I learned that marinating cooked sweet potatoes and cooked red onions into scrambled eggs builds the flavor of omelet. I was munching on some nuts while waiting for the marinate.

Sweet Potato Omelet
2 small size sweet potatoes diced
1/2 onion diced
2 free range brown eggs
1 tb water
olive oil
salt and pepper
Toasted bagel

Scramble eggs and water and add salt and pepper. Fry sweet potatoes, incorporate into scrambled eggs. Sautee onion and incorporate into scrambled eggs. Mix. Let stand 15 minutes and cook. Sandwiched in toasted bagel and feed hungry stomach.

Wednesday, February 18, 2009

Arroz Caldo de Pollo


I like cooking arroz caldo especially with chicken. In winter months when it is 40 degrees F outside and the wind is blowing 15 miles per hour, it is nice to cozy up in front of the tv and eat a bowl of arroz caldo de pollo. Since I moved to Northern California, I have been making arroz caldo de pollo. I would take my food lay it on a coffee table, I would wrap myself in an afgan, turn on the tv, get comfortable, then I would take my hot bowl of arroz caldo and eat away.

I make arroz caldo in the winter because it warms and fills me. The hot caldo or broth is sufficient enough for me to stand the cold. After I finish eating my bowl of arroz caldo, I feel hot inside and start to sweat a little bit. I look forward to making arroz caldo to reenact that feeling of warm and sweat--something that does not come often in winter months in Northern California.

My version of arroz caldo de pollo is also filling. I put everything in it--carbohydrates in rice, protein in chicken, vegetables in peas. It is very simple and easy to make. So cozy up in winter months and make arroz caldo de pollo.

Arroz Caldo de Pollo
2 chicken breast cut into 1" slices
8 garlic cloves (I love garlic!)
1 red onion
salt
pepper
bay leaf
sprig of rosemary
1 c rice (I use jasmine and brown rice)
4-5 c chicken broth
olive oil

Saute onion and garlic in olive oil. Add a pinch of salt to sweat onion and garlic. Remove from pan and set aside.

Salt and pepper chicken. Brown chicken in the same pan. Remove and set aside. Add more olive oil if needed. Cook rice in olive oil as if browning rice. Wait for the rice to achieve an opaque color.
When rice is opaque in color add chicken broth and wait for a slow boil. Add peas. Season with salt and pepper.
At this time turn down the heat to low and let rice cook for 15 minutes. Half way through return chicken, onion, and garlic into pan and let everything cook together. Stir the bottom so rice would not settle and stick in the bottom and that good brown stuff gets incorporated into the broth. Voila! I am eating my arroz caldo de pollo while watching American Idol.
Would you like to try this recipe? Let me know if you like this variation.

Monday, December 08, 2008

Flaky, Buttery, and Sweet Ensaimada

Where I live, ensaimada is hard to find unless I step inside Goldilocks bakery or a Filipino store that carries Goldilocks bake products. Bakery ensaimada is like a sponge cake with cheese, butter, and sugar on top, wrap individually in a cellophane with a logo. This is what ensaimada looks like to me. I am familiar with another version of ensaimada, Mulach ensaimada, which my friends brought from Canada. Mulach ensaimada is more tastier, probably more eggs and butter than Goldilocks ensaimada.

On a post on traditional ensaimada by Marketmanila and an episode from Jose Made in Spain, I pondered upon my recollection of eating original ensaimada if I had any. I remember my mom used to bring me ensaimada as pasalubong (to go food). This ensaimada is like bread but flaky. Ensaimada is well browned on the outside with a hard crust, smothered in margarine, sugar, and cheese.

Last week I tried to imitate traditional ensaimada. I am happy with the turn out. I got the taste right. The texture is much flakier than expected due to folding and rolling of the dough and addition of cold butter. This recipe is a combination of ensaimada and croissant. It is buttery but not too airy like croissant. One ensaimada is filling and a good portion for breakfast.

I began proofing the yeast for this recipe the day before I baked it. If I were to time how long to make ensaimada, I would say at least 20 hours. I did not rush the process after all baking is a premeditative method of art. I proofed yeast in 70 degrees F temperature. When I left my kitchen and turned off the heater, I put the oven in warm for a few minutes and continued proofing the dough inside the warm oven. The temperature inside the oven was between 80-90 degrees F. The warmer the temperature the faster the dough rises. Warm is better than cold.

About the ingredients, I used whole wheat flour and all purpose flour in this recipe. I have been using whole wheat flour when baking because its healthy and good for the body. Some say to use 7/8 c of whole wheat flour for every cup of all purpose flour. Others say the substitution is 1 is to 1. How much to use and substitute is upon the baker's discretion. The addition of sugar in this recipe leaves the dough with a slight sweet taste but not overpowering other ingredients such as eggs and milk. Also, I used lots of cold butter to produce flaky texture and buttery taste. Cold butter in the oven creates pockets inside the dough that retains its shape as it bakes, creating flaky texture. Lots of butter gives unforgettable rich taste of croissant like bread.

Aside from the above credits, I also studied Joy of Cooking. I owe baking techniques from this wonderful book.

Here's what I developed:

2 1/4 tsp. yeast
1/3 c. warm water 100 F

Let stand five minutes until yeast has expanded.

Add 3/4 c. all purpose flour

Let rise for 6 hours at approximately 70-80 degrees F.

Add and mix for 5 minutes:
1 3/4 c whole wheat flour
3 eggs
3 tb sugar
2 tb milk
1 tsp salt

When consistency slowly pulls away from the bowl knead for 7 minutes with a dough hook or 15 minutes by hand. ( I kneaded by hand just for the experience.)
Then transfer to an oiled bowl and let proof for 1-4 hours or until doubled in size.
Add 12 tb cold butter in cubes. Remember to use cold butter so ensaimada turns out flaky. Try to retain the shape of cubed butter. Like I mentioned, solid cubed butter produces pockets for flaky crust. So butter would not melt, put in fridge for 6-9 hours. To shape the dough, roll like a log about 20 inches long and 1 inch diameter and into a spiral with spaces in between each turn. Place on greased baking sheet and let rest for 30 minutes to 1 hour and cover with plastic wrap. Make sure room temperature is within 70-80 degrees, you don't want to melt the butter just yet. (picture below taken after 1 hour resting period.) Remove plastic before baking.

Bake in preheated 375 degree F oven for 20 minutes.
I would say that they were pretty squished in here. I did not realize how much space they needed to rise after I shaped them into spirals. So leave a lot of room for yeast expanding.I skipped the cheese only because I feel this recipe is too rich in butter and sugar that I could omit the addition of another dairy. If I were to make this recipe diet friendly, I would reduce the amount of butter into 6 tbsp and add 3 tb veg/olive oil, however compromising the texture of ensaimada but not totally omitting butter. I would not spread butter and sprinkle sugar on top of the baked product. I like this recipe and I think I'll bake it again using low fat recipe.

Monday, November 24, 2008

A Box of Sweet Potatoes and Ginataan

What do you do with a box of sweet potatoes? Think ginataan or bilo-bilo. It is a delicious dessert. It is filling and nutritious. Most of all, it screams Filipino dessert! Ginataan, bilo-bilo is so popular; many Filipinos make this dessert to bring to a church potluck. My family likes to warm the souls of a church crowd with this dessert. It is simple and easy to make. Most of all, it is also budget friendly. The cost of making ginataan to feed 20 people: $ 10.00-12.00.

Here's what you need:
1/2 c. Sweet Rice Flour plus more for flouring hands
2 tbsp. warm Water
2 cans Coconut milk
1/4 c. Tapioca
4 c. Water
4 medium size Sweet Potatoes cubed
2 large or 4 medium Gabi (Taro) Root cubed
4 Musa Saba Bananas cubed
1 jar Coconut Gel (Nata de Coco) drained
1 can Jackfruit drained cubed or julienned
1/3 c. Sugar

In a separate 1 quart pot, bring 4 cups of water to a boil. When boiling vigorously, pour tapioca. Shut off heat and pull away from stove. Set aside for 1 hour.

Sweet rice flour on a deep dish, make a well and pour warm water. Keep adding water until flour is flexible and gives a wet consistency. Mixture should be pliable but firm. Take a handful and squeeze in the palm of hands. Mixture should form a clump. Put some flour on the palm of hands and make 1/4 inch balls by rolling flour mixture between palms to resemble marbles. Set aside. Prepare the rest of ingredients by slicing in cubes sweet potatoes, saba bananas, gabi root, and jackfruit. Jackfruit can be julienne (cut in long slices).
Bring 2 cans of coconut milk to a boil. Add more water if desired. When small bubbles rise on the surface, coconut milk is ready.

Add prepared sweet rice flour balls and wait for second boil. Stir occasionally to prevent from sticking on the bottom of pot. When bubbles appear on the surface, add gabi, sweet potatoes and sugar. Keep stirring as coconut milk has a tendency to burn easily and settle on the bottom to form solid consistency; an easy mistake to ruin ginataan.

When gabi and sweet potatoes are fork tender, add saba bananas. Bananas should also be fork tender and are faster to cook than gabi and sweet potatoes. Continue stirring.
Add coconut gel and jackfruit. At this time, tapioca balls should double in size. The outer layer should be opaque with a white center. When squeezed between fingers, the center is hard. Tapioca is still half cooked; it continues cooking when added into the pot of coconut milk. Continue stirring. Wait for mixture to come to a boil and make sure all ingredients are fork tender. This is a good time to taste and add more sugar if necessary. It should be sweet but not like candy. When done remove from heat. Place in deep container and saran wrap tightly. Now its ready to travel to church. Place in a box to protect car seat. Upon arrival at church, microwave in church kitchen and enjoy ginataan, bilo-bilo, in cold, gloomy fall weather with church crowd.

Monday, November 17, 2008

Mechado

This weekend I cooked beef mechado. I have never cooked mechado before. I have no idea how to cook it or what's in it. But I do know how it taste. The best way to know something I do not know is to google an idea. On google search, I typed mechado and I came across these recipes from great blogs and websites. I followed and combined some recipes I found online such as Market Manila, Honolulu Food Blog, "The Tasty Island," and Cooks.com. I used techniques I learned from Lidia's Italy. From little information and little cooking experience I have, I invented my own mechado. The result was delicious. The whole casserole of mechado was all gone now.

Here's what I put in it and how I did it:

2 lbs beef (I used grass fed beef. I happen to have some grass fed beef from a local farm. I cut them in one inch size to reduce cooking time.)
2 cans beef stock
4 cloves garlic
2 onions cut in quarters
4 russet potatoes diced
4 med carrots cut 1/2 inch
1 red bell pepper diced
1 green bell pepper diced
4 tomatoes diced
2 tbsp tomato paste
1/3 c soy sauce
1/3 c red wine vinegar
1/3 c red wine (Cabernet Sauvignon)
2 lemons
3 bay leaves
crushed red chili flakes
whole black pepper
salt
crushed black pepper


First I marinate beef in 2 fresh squeezed lemons for 30 minutes. The marinate helps to tenderize beef, which is a must for grass fed beef for it has higher muscle content than store bought beef. Higher muscle content means longer cooking time, so marinating is the best option to go green, reducing electric bill. Rinse beef and let dry. Salt and add crushed black pepper. Now brown beef in olive oil and hot pan. Then set aside.
2. Brown potatoes and carrots then set aside.
3. Then be ready for some great aroma in the kitchen. Saute onions then add garlic. Add tomato paste, 1 diced tomato and red chili flakes to give foundational flavor to mechado. Put beef back in the casserole and add red wine to burn alcohol. Pour beef stock, soy, vinegar and allow beef to tenderize. Add to this bay leaves and whole black pepper. Watch stock content occasionally, making sure stock is right on beef level. It took me 1 hr 15 minutes.

4. When beef is fork tender, add to pot: potatoes, carrots, red and green bell pepper and tomatoes. Cook for another 15-20 minutes. Serve with steam rice and enjoy with family.
FYI: When goat is used instead of beef, the recipe changes name to Kaldereta, which came from "kalding" (Goat in Ilokano). Source from wikipedia: Mechado. Accessed Nov 17, 2008.

Tuesday, November 04, 2008

I love you, Brownies


Dear Brownies,

I love you very much. You are very delicious, warm, and cozy. You bring me comfort and you ease my soul. After a long day when I bite into you, I feel relieved of all the tension and anxieties. I appreciate your creation and whomever invented you. Come back soon. I'll miss you in the cold breezy fall nights.

Craving you,

Gen A.


Recipe for delicious, warm and cozy brownies adapted from Joy of Cooking:

In a double boiler:
Place 4 oz. dark chocolate (best quality brings best results.)
Add 1 stick of butter and take it off from heat and let cool.

Add 4 eggs and 1 c. sugar and 1/4 c. honey (I altered this to make recipe hip-friendly)
Add 2 tsp. vanilla and beat well.

Then add 1 c. flour and 1/4 c. powdered chocolate (This adds distinct chocolaty flavor)
Mix 1 c. pecan or walnuts. Either sprinkle on top or mix with batter. (I prefer to add on top. Not-so-pecan lovers can pick them out according to taste.)

Prepare a greased baking pan and sprinkle with powdered chocolate. Heat oven 350 degrees F and wait 22-25 minutes. Voila! You're friends and family will love you forever.

Thursday, October 30, 2008

Do the Math: Coconut Macaroon

3 x 5 = 15 Coconut Macaroons. I made these coconut macaroons. I got the recipe from Joy of Cooking Cookbook. The vanilla is overwhelming. I think I would substitute vanilla extract for coconut extract next time.
3 x 3 = 9 Coconut Macaroons2 x 2 = 4 Coconut Macaroons
Recipe for Coconut Macaroon:
In a bowl, mix:
2/3 c. sweetened condensed milk
1 large egg white
1 1/2 tsp. vanilla (You can go easy on this. Vanilla can be overpowering when too much.)
1/8 tsp. salt

Then add:
3 1/2 flaked coconut ( I added unsweetened and I liked it.)
Drop tablespoon size onto lined and greased baking sheets for 20-25 minutes in 325 degrees (F). Remember 325 degrees. I happen to forgot to turn the oven to 325 and instead opted for usual 350 degrees. I find my oven smoking. (Literally!) When the smoke in my kitchen dissipated, I peel the macaroons from the paper before letting the macaroons cool.

Pumpkin Cake


When I hear pumpkin cake, I am reminded of spices like nutmeg, cinnamon, and cloves. I remember the taste of spices bursting in my mouth. I can feel the soft and moist cake bumping onto my taste buds. In addition, the crunchiness of pecan nuts adds complexity to the spices of pumpkin cake. Adapted from Joy of Cooking
In a bowl mix:
1 1/2 cups of all purpose flour
1 1/2 tsp ground cinnamon
1 tsp. baking soda
1 tsp. salt
1 tsp ground ginger
1/2 tsp. ground nutmeg
1/4 tsp. ground cloves
1/4 tsp. baking powder

In another bowl, combine:
1/3 cup milk
1/2 tsp. vanilla

In another bowl, beat until creamy:
6 tbsp unsalted butter

Then add:
1 1/3 cups sugar

Beat well. Then add:
2 large eggs

Beat well. Then add:
1 cup pumpkin puree

Add flour mixture in 3 parts to butter and eggs mixture, alternating with milk mixture in 2 parts.

When well mixed, add 1/2 cup pecans.

Bake on greased baking pan in preheated 350 degrees(F). Then enjoy pumpkin cake with cup of coffee in rainy fall weather.

Wednesday, October 08, 2008

Quick and Easy Spaghetti Sauce?

I was looking in the pantry then the fridge for something to cook but was lazy to prepare complicated recipe. I had macaroni pasta, spaghetti sauce, carrots, celery and onions. A light bulb turned on in my head. Spaghetti with short pasta! Paired with red wine and brownies (I baked last night) and I'm in business.

I made (invented, developed???) my own Spaghetti Sauce with Short Pasta:

1/2 lb. Garofalo Casarecce Organic

2 tbsp Olive oil
1/2 yellow onion
4 sm. cloves garlic
2 stalks celery
1 med. carrot
salt
red chili pepper
1/2 can Classico Tomato, Herb, and Spices Organic
celery leaves
basil leaves
parmessan cheese

In boiling pot, add salt and macaroni. Contrary to what I have been taught that is to sautee garlic first, I learned onion should go first because garlic burns easily. In this way, onion soaks up the heat protecting the garlic from burning. Keep adding the ingredients according to the list, reserving celery, basil leaves and parmessan cheese. (If you want, you can skip the red chili pepper and substitute black pepper.) Drain macaroni while still al dente and add into the pot. When carrot is tender enough when prick by a fork, remove from fire and add celery and basil leaves and parmessan cheese. Voila! Quick and Easy Spaghetti Sauce.

Monday, October 06, 2008

Less-Calories Brownies

No worry, less calorie, brownie!!! I have never baked brownies from scratch. In my attempt to increase my appetite by eating desserts first before main course, I searched for a brownie recipe. I found a low-fat recipe in the Joy of Cooking. The first recipe is Brownie Cockaigne. However, the recipe calls for 2 c. of sugar for 1 c. of flour. Yikes!!! Hello sugar rush!!! So, I opted for low-fat brownie. As soon as the brownie is cool enough to touch, I began my first bite, then second, then third. I was hungry, not for more brownies, but for food. So, I heated baked chicken from Costco and ate with rice, ketchup, and hot sauce. I know its weird, but I increase my appetite by eating desserts first and whatever pleases my palate.

I grab all ingredients and place them on the counter.
Still looks nice, right???
Yes, that is a huge bottle of vanilla extract.
The huge white/clear container in the back is the sugar container.

This is what my counter looks like after
I attempted to mix and melt and beat all ingredients.

Voila! Less-Calories Brownies

Less-Calories Brownies, Adapted from Joy of Cooking
3/4 c. flour
1/4 tsp. baking soda
1 1/2 tbsp. unsweetened cocoa

In a pan, with low heat, melt:
4 oz. bittersweet chocolate
1/3 c. butter

Remove from fire; let cool, then add:
1/2 c. brown sugar
1/4 c. sugar
2 tbsp honey
1 tbsp. water
2 tsp. vanilla

Mix well then add:
2 eggs

Beat well. Preheat oven 35o degrees. Bake 20-25 minutes in 8x8 square pan, lined with greased aluminum foil. Enjoy and increase your appetite.

Saturday, October 04, 2008

Banana Bread

Adapted from Betty Crocker's International Cookbook

2 1/2 c all purpose flour
1/2 c sugar
1/2 c brown sugar
1/2 tsp baking powder
1/4 tspbaking soda
1 tsp salt
1/2 tsp ground alspice
3 medium banana
1/4 c milk
6 tbsp butter
2 eggs
1 1/2 tsp lime peel
1 tbsp lime juice

Heat oven to 350 degrees. Grease bottom of loaf pan. Mix all ingredients. Beat 30 seconds. Pour into pan. Bake 45-55 minutes until wooden pick comes out clean.

Tuesday, September 16, 2008

Pesto and Rigattoni

My mom bought a bunch of basil leaves at the flea market on Saturday. What should I do with a bunch of basil??? I thought of making pesto sauce. I found this recipe on this blog. When I was reading through the ingredients, I noticed the recipe asks for pistachio nuts. Unfortunately, I dont have any pistachio nuts, so I substituted. Its what I always do. I use pecan nuts. It taste good!!! Traditionally, pesto sauce asks for pine nuts instead of pistachio. Since substitution is welcome in home kitchens, why not substitute pecan nuts for pistachio nuts, which was substituted instead of pine nuts??? I love the freedom of substituting to make something out of anything. Hey, on a slow, gloomy, late summer, fall-like weather in Central Valley, anything is possible even pesto with pecan and rigattoni pasta. BTW, rigattoni is also substituted for long pasta.


The joy of substitution!!!

Basil and Pecan Pesto adapted from Desert Candy.

1 large clove garlic or 2 small
1/4 teaspoon sea salt
1 cup packed basil leaves washed
3 tablespoons roughly-chopped pecan
1/2 cup freshly grated Parmigiano-Reggiano cheese
about half a lemon's worth of fresh lemon zest
6 tablespoons extra-virgin olive oil

  1. In a food processor, chop pecan nuts and set aside. In the same food processor, with the motor running, puree the garlic and salt. Add basil leaves the pecan nuts and process into a paste. Add lemon zest and cheese. To store, pack into a container with a lid. Leave a space for the lip of the container and top with olive oil.
So easy...home made pesto sauce.

Friday, September 12, 2008

Baking???

I have been baking oatmeal cookies for some time now. I bake cookies for my parents to take with them to work. (They are my kids =) ) I started with the recipe on the lid of quaker oatmeal. The cookies turned out well. I have some issues with proportion mainly with not enough liquid to mix with the dry ingredients. So I want to try other recipes. I have tried using apples and pears. (More on these recipes later.) I have also tried adjusting the original recipe from the quaker oatmeal. Unfortunately, I have not succeeded.

After so many tries, I come across a recipe from Martha Stewart website. I have to change the proportions and substitute black currants for dried cherries. What I discovered is better the best oatmeal cookie I have baked so far.


These cookies look so delicious!!!

Oatmeal-Black Currant Cookie
3/4 c. all purpose flour
1 tsp. cinanamon
1 tsp. baking soda
1/4 tsp nutmeg
1/4 tsp salt
1 c. unsalted butter
1 c. brown sugar
2 eggs
1 tsp. vanilla
3 c. oatmeal
1 c. black currants

Combine dry ingredients except oatmeal and black currants and wet ingredients. Add oatmeal and black currants. Bake 350 degrees for 10-12 minutes.